
Understanding Drag and Drop Functionality using JavaScript and SASS
.
11 minutes
When it comes to elevating user experience and interaction in web applications, incorporating advanced reordering drag and drop functionality is important. Tools like Jira and Trello have long mastered the art of intuitive reordering, allowing users to organize and prioritize tasks in these applications.
When Should You Add Drag and Drop Functionality?
The use cases for drag and drop functionality vary across different applications. For instance, you might want users to rearrange the order of items in a to-do list, customize the layout of dashboard widgets, or organize files in a file explorer. Implementing drag and drop helps you accomplish these interactions effortlessly, enhancing user engagement and productivity.
Real-World Projects that Can Use Drag and Drop functionality
Here are real-world projects where drag and drop functionality can make a significant impact:
-
Task Management Application: In a task management app, users can drag tasks to different columns (e.g., “To Do,” “In Progress,” “Done”) to track their progress. This intuitive feature streamlines task management and planning.
-
E-commerce Storefront Customization: Online stores can allow users to personalize their shopping experience by dragging products into a wishlist or rearranging items in a shopping cart. This customization enhances user satisfaction and encourages higher conversion rates.
-
Content Management System: Content creators can utilize drag and drop to reorder articles, images, and multimedia elements within a page layout. This simplifies content organization and saves time when crafting engaging web pages.
In this tutorial article, we will create a simple “Task List” application where users can reorder elements. And we will be using SASS to design this application. Before we get started, let’s explore SASS.
What is SASS?
It is important to understand why SASS is a valuable tool in your web development stack. SASS, which is short for Syntactically Awesome Style Sheets, is a preprocessor scripting language that extends the capabilities of traditional CSS. Sass has two syntaxes. They use the .scss and the .sass file extensions. The .sass file extension is the original syntax of SASS while the .scss has the closest similarity to traditional CSS which is why it is most popular.
Here’s a brief explanation:
- SASS: SASS uses a whitespace-based syntax with indentation. It omits semicolons and curly braces for a cleaner and more concise style.
- SCSS: SCSS uses a more traditional CSS-like syntax with curly braces and semicolons. It provides a smoother transition for developers already familiar with CSS.
Now, both SASS and SCSS offer similar benefits as preprocessors.
Why should you use SASS?
-
Modularity and Organization: SASS allows development to modularize styles through the use of variables and mixins, making code organization and maintenance easy.
-
Code Reusability: With mixins, you can create reusable blocks of CSS code, reducing redundancy and promoting consistency throughout your project.
-
Nesting for Readability: SASS employs a nested syntax that mirrors HTML structure, improving code readability and maintainability.
-
Mathematical Operations: SASS supports mathematical operations, making it easier to handle responsive design and complex layout calculations.
-
Streamlined Maintenance: SASS simplifies the process of maintaining and updating stylesheets, a boon for large-scale projects.
Understanding SASS vs. CSS
It’s vital to point out that SASS is not a replacement for CSS but rather an enhancement. It is an extension to CSS and compatible with all versions of CSS. So, here are what sets SASS apart from CSS:
Variables
While CSS enables you to define variables with the var() function and by following the –variable-name naming convention. For instance –
:root {
  --gray: #f4f4f4;
  --white: #ffffff;
}

body { background-color: var(--gray); }
The above functionality was not in existence before 2012, and began supported by major browsers by 2017. What SASS does is allo you to define variables, facilitating the reuse of values like colors, fonts, or dimensions across your stylesheets. In SASS, you can define variables using the $ symbol. Here’s an example:
$gray: #f4f4f4;
$white: #ffffff;

body {
  background-color: $gray;
}
Nesting
SASS permits the nesting of selectors within one another, mirroring the HTML structure, which results in cleaner and more organized code. Here is an instance –
.container {
  background-color: $gray;
  font-size: 16px;

  a {
    color: $white;
    text-decoration: none;
  }

  &:hover {
    background-color: $white;
    color: $gray;
  }
}
Mixins: Reusable Style Blocks
Mixins are like functions in SASS. They allow you to define reusable style blocks that you can include wherever needed. You can look at Mixin as a way to avoid repetitive code. For instance, if you often use a specific flexbox setup for centering elements, you can create a mixin for it like so:
@mixin flex-center {
  display: flex;
  justify-content: center;
  align-items: center;
}

.container
  @include flex-center
This flex-center mixin applies the necessary styles to center elements both horizontally and vertically. So, whenever you need this style, just include the mixin, and your code remains DRY(Don’t Repeat Yourself). Also, you can use it in defining custom styling for different elements. Let’s use a button as an instance.
@mixin button-styles {
  background-color: $gray;
  color: $white;
  padding: 10px 20px;
  border: none;
  border-radius: 4px;
}

.btn-primary {
  @include button-styles;
  font-weight: bold;
}

.btn-secondary {
  @include button-styles;
  background-color: $white;
  color: $gray;
}
Extending Styles
In SASS, you can extend styles from one selector to another. This is incredibly useful for inheriting styles while still having the flexibility to override specific properties when needed. Here’s an example:
.error-message
  color: red

.form-error
  @extend .error-message
  border: 1px solid red
So, extending the ‘.error-message’ class, allows you to inherit its color property while adding a border to .form-error. So, this gives you flexibility with your styling while keeping your code efficient and maintainable.
Mathematical Operations
SASS also supports mathematical operations within your stylesheets. You can perform calculations directly in your SASS code. For instance:
$container-width: 800px

.container
  width: $container-width
  margin: 0 auto

.inner-content
  width: 100% - 20px
In this example, we calculate the width of .inner-content based on the $container-width variable. SASS handles the math for you.
Organizing Your Styles
With SASS, you can break your styles into multiple files and import them where needed. This modular approach makes your codebase more maintainable and easier to collaborate on. Here’s how it works:
Create separate SASS files for different sections of your website or specific components.
Use the @import directive to include these files in your main SASS stylesheet.
So, when you organize your stylesheet in this way, you can work on smaller, manageable chunks of code, reducing the chances of conflicts and errors.
Compiling SASS to CSS
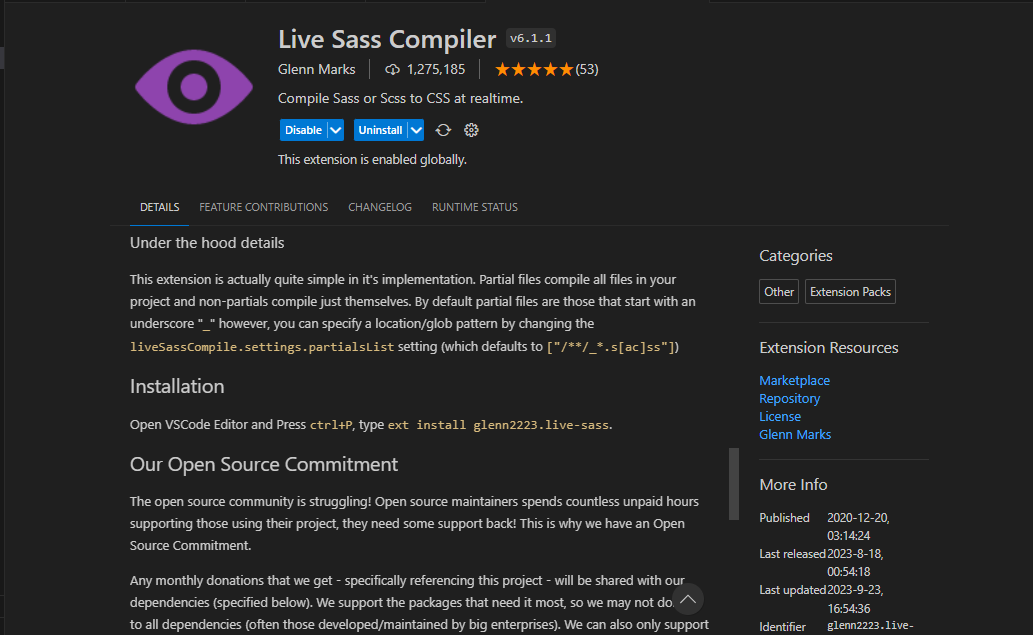
While SASS is a powerful tool for writing and organizing your styles, web browsers can’t directly interpret it. You need to compile your SASS code into regular CSS before deploying it. Luckily, there are various tools and extensions available that can handle this compilation process for you. One popular choice is the live SASS compiler, which instantly updates your CSS as you make changes in your SASS files.
Building a Drag-and-drop Task List with SASS and Javascript
So, in this tutorial, we will walk through the creation of a simple drag-and-drop task list using JavaScript and style the files with Sass. This interactive task list will allow you to add, delete, and reorder tasks effortlessly. We’ll start from scratch, and I will explain each step along the way.
Prerequisites
Before we begin, ensure that you have a basic understanding of HTML, CSS, and JavaScript. Also, make sure you have a code editor ready to work with. Then, you should also download the Live SASS Compiler extension.
Setting Up the Project
Before we start implementing drag and drop functionality, let’s set up our project with SASS. Here are the steps:
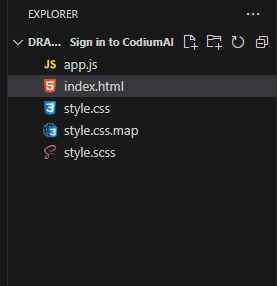
Project Structure:
You can organize your project files into a structure like this:
- project/
  - index.html
  - style.scss
  - app.js
Implementing Drag and Drop Functionality
Now that our project is set up, let’s look into implementing drag and drop functionality using JavaScript and SASS. Here is the in depth guide to proceed.
Setting Up The HTML
Firstly, start by creating an HTML file (e.g., index.html Within our html file, let’s add the code we will be working with.
<!DOCTYPE html>
<html lang=“en”>
<head>
  <meta charset=“UTF-8” />
  <meta name=“viewport” content=“width=device-width, initial-scale=1.0” />
  <title>Task list</title>
</head>
<body>
  <div class=“container”>
    <h1>Task List</h1>
  <div class=“task-input”>
  <input type=“text” id=“taskInput” placeholder=“Add a new task” />
  <button id=“addTask”>Add</button>
</div>
<ul id=“taskList”>
<!-- Tasks will be added here dynamically -->
</ul>
</div>
<script src=“app.js”></script>
</body>
</html>
Here, we have a basic HTML structure with an input field, a button for adding tasks, and an empty <ul> element where our tasks will be displayed.
Initializing SASS file
Create a SASS file (e.g., style.scss) to write your styles. Install Live Sass Compiler extension (if you haven’t). Then, click the Watch SASS link on the status to compile your sass file to css.

It will generate the compiled css files that will be used in your application.Here is how your folder structure should look like at this point.
Then, import the style.css file that has been generated from the compiler. We can’t use the style.scss directly in the head section because HTML does not recognize sass files. But you don’t need to ever modify the .css file because everything in your .scss file will be updated automatically in your .css file.
So, your <head> section should look like this:
<meta charset="UTF-8" />
    <meta name="viewport" content="width=device-width, initial-scale=1.0" />
    <link rel="stylesheet" href="style.css" />
    <title>Task list</title>
  </head>
Styling the application
For the CSS styling, you can copy these:
$primary-color: #007bff;
$secondary-color: #dc3545;


body {
  font-family: "Arial", sans-serif;
  background-color: #f0f0f0;
  text-align: center;
  margin: 0;
  padding: 0;
}


.container {
  background-color: #fff;
  border-radius: 10px;
  box-shadow: 0 4px 8px rgba(0, 0, 0, 0.2);
  padding: 20px;
  margin: 20px auto;
  max-width: 500px;
}


h1 {
  color: #333;
  margin-bottom: 20px;
}


.task-input {
  display: flex;
  justify-content: space-between;
  align-items: center;
  margin-bottom: 20px;
}


input[type="text"] {
  flex: 1;
  padding: 10px;
  border: 2px solid #ccc;
  border-radius: 5px;
  font-size: 16px;
}


button#addTask {
  background-color: $primary-color;
  color: #fff;
  border: none;
  border-radius: 5px;
  padding: 10px 20px;
  font-size: 16px;
  cursor: pointer;
  transition: background-color 0.3s ease-in-out;


  &:hover {
    background-color: darken($primary-color, 10%);
  }
}


ul {
  list-style: none;
  padding: 0;
}


li {
  display: flex;
  justify-content: space-between;
  align-items: center;
  padding: 10px 0;
  border-bottom: 1px solid #ddd;
}


span {
  flex: 1;
  font-size: 18px;
}


.delete-button {
  background-color: $secondary-color;
  color: #fff;
  border: none;
  border-radius: 5px;
  padding: 5px 10px;
  font-size: 16px;
  cursor: pointer;
  transition: background-color 0.3s ease-in-out;


  &:hover {
    background-color: darken($secondary-color, 10%);
  }
}
Here is a rundown of what we have above.
-
custom variables,
$primary-colorand$secondary-color, store color values for easy reference throughout the stylesheet. The styling for thebodysets the font, background, and centers text while removing default margins and padding. Elements with the class.containerhave a white background, rounded corners, subtle box shadow, and are centered with a maximum width of 500px.<h1>elements are styled with a dark gray color and a margin at the bottom. -
elements with the class
.task-inputare arranged in a flex container with horizontal spacing and vertical alignment, with margin at the bottom.<input>elements of type “text” expand to fill space, have padding, a border, rounded corners, and a specified font size. -
the
button#addTaskstyles a button with a background color from the$primary-colorvariable, white text, rounded corners, padding, and a smooth color transition on hover. Lists (ul) have their default styles removed, and list items (li) are arranged as flex items with spacing, vertical alignment, padding, and a light gray border at the bottom.<span>elements expand to fill space and have an increased font size. Elements with the class.delete-buttonhave a background color from the$secondary-colorvariable, white text, rounded corners, padding, and a smooth color transition on hover, achieving a cohesive and visually appealing style for various elements on the webpage.
As you can see, we are utilizing the core features of SASS in our styling by creating variables, using nesting, to buttress our functionality. Implementing Javascript
Now, let’s work on our JavaScript code. Do ensure that your js file is linked to your HTML file. So, above the closing body tag, you should have something like this:
<script src="app.js"></script>
Step 1: Load the document before Javascript execution
document.addEventListener("DOMContentLoaded", function () {
	// rest of the code goes in here

}
We begin by adding an event listener that waits for the document to be fully loaded before executing any JavaScript. This ensures that our code doesn’t run until the HTML structure is ready.
Step 2: Access elements from HTML and define the variables
const taskInput = document.getElementById("taskInput");
const addTaskButton = document.getElementById("addTask");
const taskList = document.getElementById("taskList");
Next, we select three essential elements from the HTML using their IDs. taskInput represents the input field where users can enter tasks, addTaskButton is the button to add new tasks, and taskList is the unordered list where tasks will be displayed.
let draggedItem = null;
We initialize a variable draggedItem as null. This variable will be used to keep track of the currently dragged item during drag and drop operations.
Step 3: Load content from local storage
// Load tasks from local storage on page load
const savedTasks = JSON.parse(localStorage.getItem("tasks")) || [];
for (const taskText of savedTasks) {
  addTaskToList(taskText);
}
Here, we load previously saved tasks from local storage when the page loads. We retrieve these tasks, if they exist, and iterate through them, adding each task to the task list using the addTaskToList function which will be defined later. If they don’t, we return an empty array.
Step 4: Add event listener to create tasks
addTaskButton.addEventListener("click", function () {
  const taskText = taskInput.value.trim();

  if (taskText !== "") {
    addTaskToList(taskText);
    taskInput.value = "";
    saveTasksToLocalStorage();
  }
});
We add a click event listener to the “Add Task” button. When the button is clicked, we check if the input field (taskText) is not empty (trimmed to remove extra spaces). If it’s not empty, we call the addTaskToList function (to be defined later) to add the task to the list, clear the input field, and save the updated tasks to local storage.
taskInput.addEventListener("keypress", function (event) {
  if (event.key === "Enter") {
    addTaskButton.click();
  }
});
We also add an event listener to the input field that listens for a keypress event. If the pressed key is “Enter,” it simulates a click on the “Add Task” button. This allows users to press Enter to add a task.
Step 5: Create “Add tasks to list” function
function addTaskToList(taskText) {
  const li = document.createElement("li");
  li.draggable = true; // Make the newly created task item draggable
  li.innerHTML = `
        <span>${taskText}</span>
        <button class="delete-button">Delete</button>
    `;
The addTaskToList function creates a new list item (li) for each task. We set the draggable attribute to true to make these items draggable. We also set the inner HTML of the list item, including the task text and a delete button.
taskList.appendChild(li);
We add the newly created list item to the task list (taskList) in the HTML.
Step 6: Delete task from list functionality
li.querySelector(".delete-button").addEventListener("click", function () {
  li.remove();
  saveTasksToLocalStorage();
});
For each task item, we add a click event listener to the delete button with class “delete-button.” When clicked, this event handler removes the associated task item and saves the updated task list to local storage.
Step 7: Add event listeners for drag and drop
// Add event listeners for drag and drop
li.addEventListener("dragstart", function (e) {
  draggedItem = this;
  setTimeout(function () {
    draggedItem.classList.add("dragging");
  }, 0);
});

li.addEventListener("dragend", function () {
  draggedItem = null;
  this.classList.remove("dragging");
  saveTasksToLocalStorage();
});
We attach two event listeners to each task item to handle drag and drop functionality. The dragstart event occurs when a draggable item is dragged. We set draggedItem to the current item and apply a class to it for styling during drag. The dragend event occurs when the item is dropped, where we reset draggedItem and remove the “dragging” class. We also save the updated task list to local storage after dropping.The function for the saveTasksToLocalStorage will be defined subsequently.
taskList.addEventListener("dragover", function (e) {
  e.preventDefault(); // Allow dropping
  const afterElement = getDragAfterElement(taskList, e.clientY);
  const currentElement = document.querySelector(".dragging");
  if (afterElement == null) {
    taskList.appendChild(currentElement);
  } else {
    taskList.insertBefore(currentElement, afterElement);
  }
});
Finally, we add a dragover event listener to the task list itself. This event allows elements to be dropped into it. We prevent the default behavior to allow dropping. We then determine the position where the dragged item should be inserted using the getDragAfterElement function (which will be defined later). Depending on the position, we either append the item to the end of the list or insert it before the identified element. This enables users to reorder tasks through drag and drop.
Step 8: Save to Local storage
// Function to save tasks to local storage
function saveTasksToLocalStorage() {
  const tasks = [...taskList.querySelectorAll("li")].map(
    (li) => li.querySelector("span").textContent
  );
  localStorage.setItem("tasks", JSON.stringify(tasks));
}
The saveTasksToLocalStorage function retrieves all the task items in the list, extracts their text content, and stores them in local storage as a JSON array. This ensures that tasks are saved and persisted even after refreshing the page.
Step 9: Function to get the element after which we should drop the dragged item
function getDragAfterElement(container, y) {
  const draggableElements = [
    ...container.querySelectorAll("li:not(.dragging)"),
  ];
  return draggableElements.reduce(
    (closest, child) => {
      const box = child.getBoundingClientRect();
      const offset = y - box.top - box.height / 2;
      if (offset < 0 && offset > closest.offset) {
        return { offset, element: child };
      } else {
        return closest;
      }
    },
    { offset: Number.NEGATIVE_INFINITY }
  ).element;
}
});
Lastly, we define the getDragAfterElement function. This function calculates the element after which the dragged item should be dropped based on its position (y coordinate). It considers the closest element to the mouse pointer and allows for precise task reordering during drag and drop operations.
And that is it. For the entire code and to see how it looks like in real time, you can view it on github here
Wrapping it Up
In this tutorial, we have created a task list manager with drag and drop functionality using JavaScript and SASS. We’ve explained what SASS is and why it’s important. We’ve also explained each line of code for the drag and drop functionality, from adding event listeners to handling local storage, enabling you to build your own interactive web applications with ease. So, you can proceed to building your applications with drag and drop features.
Leave a Reply